Savonia's material testing services
Tensile, compression & fatique tests

Tensile strenght tests can be used to measure material strength properties and behaviour during tensile stress. Material specifications are needed in use case determinations and in quality control.
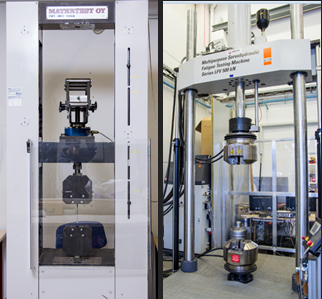
- Static tensile test in room temperature is performed according to SFS-EN ISO 6892 -standard using a loading frame.
- Dynamic fatique testing is done according to customer needs and machine specifications using Walter&Bai Dynamic fatique testing machine.
- The tensile tests for determining material mechanical properties are done using standard defined test bars, in addition tensile tests can be done to measure the structural strength properties of a structure or a product.
- Our machines:
- Matertest FMT - MEC 100, Static tensile or 3-point bending tests 1 - 100 kN
- Walter & Bai LFV 500, Static and/or dynamic tensile and/or compression tests ± (2,5 - 500) kN
Hardness test

With the hardness test machines in use we can provide the following surfacehardness tests, according to the listed standards.
- Standard SFS – EN ISO 6508 – 1, Rocwell HRB and HRC hardness tests. These are suitable for routine tests for hard materials.
- Standard SFS – EN ISO 6506 – 1, Brinell hardness test. This is suitable for non-homogenous materials because of the big measurement impression.
- Standard SFS – EN ISO 6507 – 1, Vickers hardness test. This is suitable for both soft and hard materials.
- Reports as agreed.
- Our machines:
- ERNST AT 130 DRN, Brinell HB 30 hardness
- Omag FFRI, Rockwell HRB ja HRC hardness
- Struers Duran Scan - 20, Vickers hardness

Charpy V-notch impact test
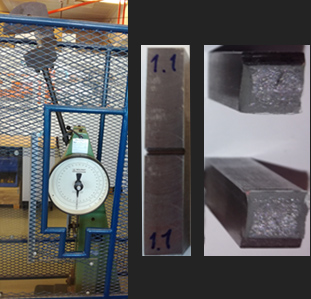
- The impact test is done using Charpyn impact hammer according to SFS – EN ISO 148 – 1 -standard.
- An V-impact test rod is manufactured from the test material according to the standard.
- Charpy impact test result is the impact energy in Joules, which is spend to break the test rod. Other terms for the measured value are e.g. impact ductility, energy to fracture, notch toughness and impact strength.
- The hammer test range is from 0 to 150 J
- Reports as agreed.
Microstructure research
- A microsection sample button is prepared by molding a test sample in epoxy, and fine sanding a surface for microscopic studying. The test sample is then etched for better visibility under microscope.
- The etched test sample is studyed under microscope to define the inner material microstructure.
- Reports as agreed.

The material testing laboratory also has an UV-testing (xenon) cabinet for testing plastic 3D-printed parts according to ISO 4892-2 standard.
We are also realizing materialtesting services together with Materia -researchcenter.
Link to Materia-researchcenter website: https://www.materiakeskus.fi/